A camera dry bag is a waterproof sack, usually with a roll-top closure, that keeps a camera, lenses and spares dry on the beach, on a boat or in a paddle-out bag. This hub explains how the closure works, how to size a bag to your kit, and how to rinse and dry it so salt does not undo the seal.
Quick answer: choose a roll-top dry bag sized to your kit with a little space to fold, roll the top down at least three times as the maker instructs, and clip it shut. A dry bag is for splashes and brief dunks, not a place to leave a camera submerged, so pad the contents and rinse the bag after salt water.
Surf camera gear on Amazon
Sponsored
As an Amazon Associate, SurferPix earns from qualifying purchases. See our affiliate disclosure.
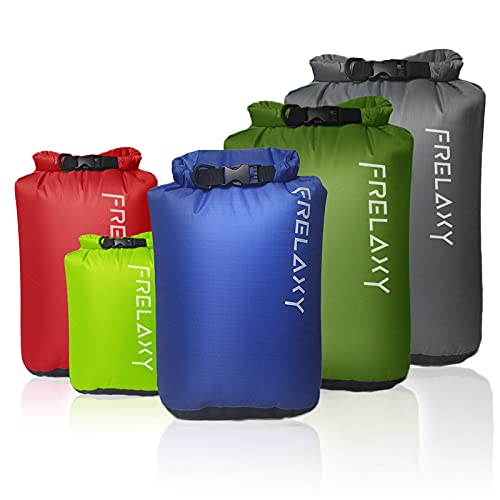
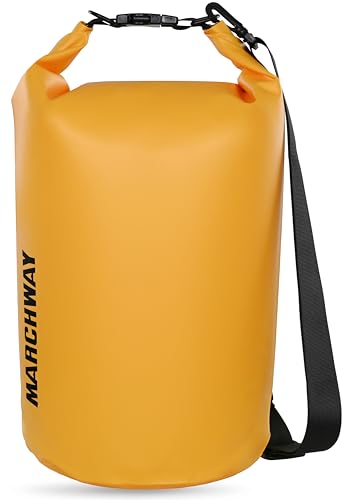
A basic roll-top dry bag for protecting an already-housed camera from spray, sand, and incidental immersion between shots. Needs enough consecutive rolls per the manufacturer's instructions to seal properly.
Reflects criteria around welded-seam construction and documented roll-count for a proper seal, not a single fold.
A dry bag built around a padded insert system, aimed at photographers transporting an unhoused camera body by boat, car, or shore that also needs bump protection, not just moisture protection. Adds bulk versus an unpadded bag.
Reflects criteria around padded-insert protection level and capacity sized to a realistic single-body kit.
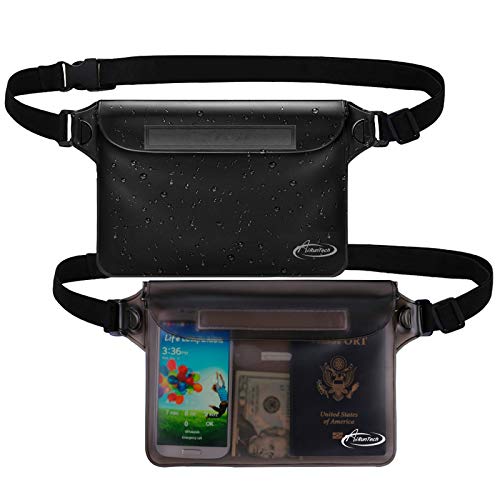
A smaller-capacity dry pouch sized for a single action camera and small accessories, aimed at minimal kits rather than a full camera body and lenses. Simpler closure than a larger roll-top bag.
Reflects criteria around capacity matched to a compact kit and a documented seam-sealing method for saltwater resistance.
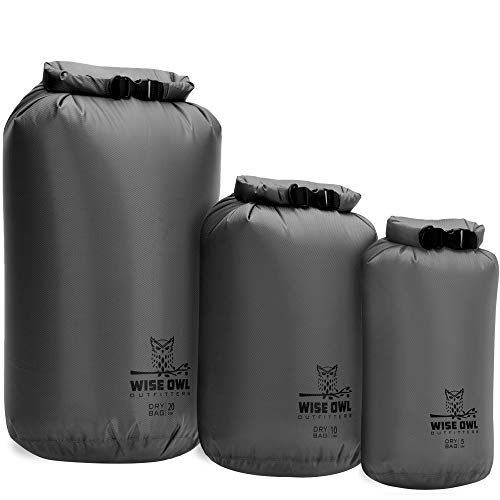
A larger dry bag sized for a full kit -- camera body, spare batteries, and accessories -- aimed at content creators carrying more than a single camera per session. Bulkier and heavier than a minimal single-camera pouch.
Reflects criteria around capacity sized to a multi-item kit and welded-seam saltwater resistance over stitched-and-taped construction.
A dry bag combines a waterproof shell with a closure that you fold and clip to form a seal. The shell is usually coated fabric or PVC tarpaulin with welded or taped seams, which is what stops water from passing through the material itself. The closure is the part that depends on you. In a roll-top design you fold the open edge down against itself several times and then clip the ends together, which creates a long, flexible barrier that water has to pass around.
The common guidance is to fold the top down at least three times, and some makers call for three to five folds. The right number is the one printed in the maker's instructions. Too few folds and the seal can open; too many on an overstuffed bag and the folds will not lie flat. Our roll-top closure technique guide shows the process step by step.
Fold count is the maker's number; some call for three to five.
Dry bag and case types compared
Dry bag and case types for camera gear
Type
Closure
Good for
Watch for
Roll-top dry sack
Fold and clip
Beach days, boats, kayaks
Technique decides the seal; no built-in padding
Camera dry bag with padding
Roll-top with a foam lining or insert
Camera bodies and lenses
Bulky; padding can hold water if the bag leaks
Waterproof pouch
Fold or track seal
Phone, cards, batteries
Small capacity; seam wear
Waterproof backpack
Roll-top with straps
Carrying a full kit to the beach
Weight; straps and zips are not always waterproof
Hard waterproof case
Latched gasket
Protection from impact as well as water
Heavier; gasket needs the same care as a housing
Pack liner
Fold inside a bag
Keeping the contents of an existing pack dry
Does not protect the pack or give impact protection
For surfers, the roll-top sack and the padded camera bag cover most needs. A hard case is worth considering if you travel with a larger kit or a housing.
How to size a dry bag
A bag that is too small will not roll properly, and a bag that is too large lets the camera slide around. Aim for a bag that holds your kit with room to fold the top at least three times. Measure the camera with its lens or housing, add the items you want in the same bag, and compare with the maker's stated dimensions or capacity.
Pack heavy items at the bottom and cushion fragile ones with a towel or foam. Do not overstuff: the bag needs a clear top edge to roll. If you carry more than one thing, use several smaller bags rather than one large one, because it limits damage if a single seal fails. Our sizing guide works through examples for a compact kit and a full shooting bag.
Measure the camera with its lens or housing and compare with the maker's stated dimensions.
How to choose a camera dry bag
Know what goes inside. Camera body, lens, housing, batteries, cards, towel.
Check the material. Coated fabric or PVC with welded or taped seams is standard. Look for stated seam construction.
Look at the closure. A wide roll-top with a stiff strip folds more cleanly than a floppy one.
Check the buckle. It should be strong, simple and easy to use with wet hands.
Consider padding. A camera needs impact protection as well as water protection.
Look for a stated submersion rating. Many are rated for splashes and brief dunks only, and the maker should say so.
Choose a colour you can see. A bright bag is easier to spot on sand and in the water.
Check the carry. A shoulder strap or backpack straps matter on a long walk.
Prices and availability were accurate when retrieved from Amazon and may change. Retrieved Nov 16, 2026.
Using a dry bag well
Technique counts. Before you pack, wipe the inside of the neck and make sure it is dry and free of sand. Put the camera in a padded pouch first if the bag has no lining. Squeeze out excess air before you fold, which makes the bag more compact and reduces stress on the seams. Fold the top down as many times as the maker states, press the folds flat and clip the buckle.
Keep the bag out of direct sun when you can, since heat builds inside a sealed bag and can fog lenses. Do not leave a camera in a sealed bag for hours in hot conditions. Keep spare batteries and cards in a separate small pouch so that one failure does not take everything. After a day at the beach, open the bag in a dry place and let the contents air out before storage.
Common mistakes
Rolling too few times. Follow the maker's minimum.
Overstuffing the bag. There is no room to fold and the seam is stressed.
Treating a dry bag as a housing. It is for splashes and brief dunks, not for being held under a wave.
Packing without padding. Water protection is not impact protection.
Putting sand on the seal. Sand in the folds creates leak paths.
Storing it wet and sealed. Mould and odour follow, and salt degrades coatings.
Ignoring wear. Check seams, folds and buckles for cracks.
Care in salt water
Salt crystals abrade coatings and can stiffen the closure strip, so rinse the bag in fresh water after every salt exposure. Rinse the outside and the inside, then dry it completely, turned inside out if possible, away from direct sun. Dry the roll-top strip and the buckle too. Store the bag loosely rolled or open, never folded tight and damp.
Look for abrasion, worn folds and damaged seams, and replace a bag that shows them rather than treating protective bags as permanent. A bag with a small crack along a fold line is already compromised. Our guide to rinsing and drying a camera dry bag after salt water covers the full routine, including how to deal with sand in the seams.
A worked example: packing a camera kit for a surf trip
Take a kit of a camera, a spare battery, two cards, a lens cloth and a towel. Put the cards and the battery in a small waterproof pouch first, because they are the items whose loss hurts most. Place the camera in a padded sleeve or wrap it in the towel, then lower it into the main dry bag with the lens facing the side. Squeeze out excess air, fold the top at least three times as the maker states, and clip the buckle. Add a small second bag for wet items such as a wet leash or a wetsuit, so they never share a space with the camera.
On the beach, keep the dry bag in the shade and off wet sand. Before you open it, wipe your hands and the neck of the bag, so you do not bring sand into the fold. Take out only what you need, and reseal the bag after each use. At the end of the session, open the bag in a dry place, let the contents air out, and dry the inside before you pack it away.
That routine takes a few minutes and protects a kit worth many times the price of the bag. Its value is not in the gear but in the habit: pack in the same order every time, and you will notice immediately if something is missing.
Questions to ask before you buy
Put a few questions to the maker's page before you commit. What is the material, and how are the seams made, welded, taped or stitched? How many times should the top be folded, and does the maker show the technique? Is the bag rated for splashes, for brief dunks or for full submersion, and for how long? Does it include padding, or is that a separate insert? What is the capacity, and does the page give dimensions so you can compare them with your camera? Is the buckle easy to use with wet hands?
If a listing cannot answer the rating question, treat the bag as splash-resistant only. If it does not mention seam construction, check the photos for visible stitching, which is a leak path. Consider the colour and the carry options too: a bright bag with a shoulder strap is easier to find and to carry along a beach path. Finally, check whether replacement parts, such as buckles, are sold, since the buckle is often the first thing to break. A bag that you can repair is a better buy than one you have to replace.
Related reading
If you also carry a phone, the waterproof phone cases hub compares cases and pouches. For protecting the camera in the water itself, see the housings hub, and for the wider kit see surf photography equipment. The gear strips on this page open Amazon category searches.
Frequently asked questions
How many times should you roll a dry bag?
At least three times, then clip the buckle. Some makers describe folding over the closure strip and then rolling two more times, so follow the number printed on your own bag.
Can dry bags be submerged in water?
Only as far as the maker states. Roll-top bags are rated differently, so read the page for your bag. To test one, close it empty with air inside, push it under water and look for bubbles before you trust it with a camera.
How to properly roll a dry bag?
Empty the air out, flatten the top edge so the closure strip lies straight, fold it down at least three times, then clip the buckle ends together. Do not overstuff the bag, because it needs a clear top edge to roll.
Camera dry bag guide for saltwater and beach use: roll-top and welded-seam construction, padded inserts, capacity, buoyancy, packing, and rinsing tips.