GoPro Surfboard Mounts and Surfboard Camera Mounts
A GoPro surfboard mount, or any surfboard camera mount, fixes an action camera to your board for a steady point-of-view shot. This hub covers nose and rail positions across shortboards, longboards, bodyboards and SUPs, with tethering and installation guidance.
Quick answer: match the mount to your board's material and shape first, then choose nose or rail position, install on a clean, dry, wax-free surface, wait out the manufacturer's curing time, and always add a retention tether. A GoPro surfboard mount works on a surfboard, bodyboard or SUP as long as the surface suits the adhesive base.
Surf camera gear on Amazon
Sponsored
As an Amazon Associate, SurferPix earns from qualifying purchases. See our affiliate disclosure.
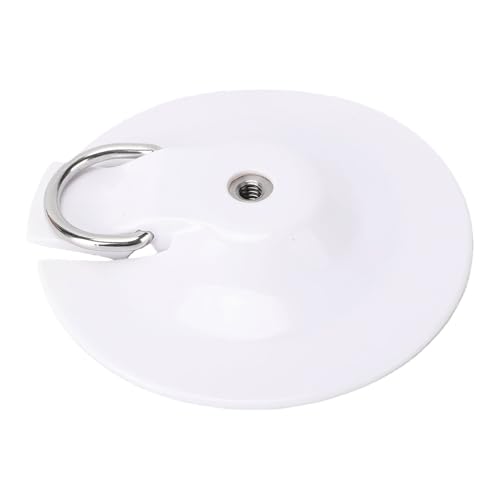
A board-nose mount sized for the narrower deck space of a shortboard, aimed at surfers who want a fixed point-of-view angle without body-mounted gear. Mounting position affects how waves catch the water near the nose.
Reflects criteria around low-profile clearance for shortboard rocker and manufacturer-documented adhesive cure time.
A rail-mounted bracket suited to the flatter, wider deck of a longboard, aimed at surfers who prefer a side angle over a nose-mounted view. Requires enough flat rail surface for a secure adhesive or screw-in bond.
Reflects criteria around rail curvature compatibility and a documented installation surface-prep process.
A mount sized and positioned for a bodyboard's shorter deck and different riding position compared to a stand-up board. Aimed at bodyboarders who want a fixed low-angle shot without hand-held gear.
Reflects criteria around bodyboard-specific deck thickness compatibility and tether pairing given close wave impact forces.
A mount built for a stand-up paddleboard's flatter, more stable deck, aimed at paddlers documenting flat-water or small-wave sessions rather than high-impact surf. Generally sees lower impact forces than a shortboard mount.
Reflects criteria around flat-deck adhesive footprint and manufacturer installation guidance for SUP deck pads.
A surfboard camera mount, including a GoPro surfboard mount, is a base that fixes to your board with strong adhesive and holds an action camera on a buckle or arm. It gives you a steady point-of-view shot without any gear on your body. Because it rides on the board, it takes spray, wave impact, wax residue and sun, so the quality of the install matters more than the brand.
Mount bases are usually flat or slightly curved, designed for the deck of a hard-top board. Foam boards, soft-top bodyboards and some SUPs have different surfaces, and not every adhesive bonds well to them. Check the maker's page for the surfaces the base is rated for, and follow the installation instructions exactly. If you are still deciding on the camera, read the surf cameras hub first, because a heavier camera or housing changes what mount you need.
Nose versus rail mounting
Nose versus rail mounting
Position
View it gives
Best for
Watch for
Nose
Rider, wave face and nose in one frame
Shortboards and longboards
Takes direct spray and impact; can catch waves if placed badly
Rail
More of a side profile
Style-focused footage
Less commonly supported; confirm rail-rated hardware
Tail or stringer area
Looking forward from behind the rider
Longboards with deck space
May interfere with foot placement
SUP or kayak deck
Flat open deck views
Paddle boards and kayaks
Check the deck material and the drainage
For the nose, avoid mounting too close to the tip in a way that catches water awkwardly. Our nose mount placement guide explains how to position the base so the camera sees what you want without pulling the board off line.
What each position shows, from the nose-versus-rail table.
How to choose a surfboard camera mount
Know your board. Shortboard, longboard, bodyboard or SUP. Deck curvature and material change what adhesive works.
Check camera weight. A camera inside a housing weighs more than a bare one. Check the mount's stated limits.
Look at the tether point. The best mounts include a way to attach a retention leash to the base or board.
Look at joint design. Fewer joints mean fewer failure points. Extensions look flexible but add leverage under wave force.
Consider removability. Some bases can be peeled off without damaging the board; others are permanent. Read the maker's removal guidance.
Choose corrosion-resistant hardware. Salt will find any weak metal.
Plan the angle. A fixed angle is stable; a pivoting arm gives flexibility but may drift.
Follow the maker's instructions where they differ.
Tethering and wave impact
Wave impact forces are significant, and no board mount on this hub is described as immune to detaching. A tether is the backup that prevents a detached camera from becoming lost gear or a hazard to other surfers. Use a tether rated for the weight of the camera and housing, and connect it to the camera body or housing, not just the mount. Keep it short enough that it cannot wrap around fins or a leash.
The tether should not strain the mount in normal use, so leave a small amount of slack. If the camera breaks free in a wipeout, the tether should hold it near the board rather than letting it sink. For detail on how force travels through a mount and tether, see surfboard mount tethering and wave impact. A floating strap or grip adds extra insurance, covered in the floating grips hub.
Surf camera gear on Amazon
Sponsored
As an Amazon Associate, SurferPix earns from qualifying purchases. See our affiliate disclosure.
Prices and availability were accurate when retrieved from Amazon and may change. Retrieved Nov 16, 2026.
Common mistakes
Installing on wax or a damp surface. The adhesive will not cure properly.
Using the mount too soon. Respect the curing time.
Mounting too close to the nose tip. The camera can catch waves awkwardly.
Skipping the tether. Always use one.
Reusing a base past its lifespan. Replace it on schedule.
Creating leash entanglement. Check the tether path against your leash.
Ignoring the weather. Installing in hot sun or cold air outside the maker's range weakens the bond.
Care in salt water
After each session, rinse the mount in fresh water, including the buckle and thumbscrew. Dry it, then check that the base is still flat against the board and the edges are not lifting. A lifting edge lets water under the adhesive and shortens its life. If you remove the camera between sessions, keep it out of the sun, and store the board out of direct heat, which softens adhesive and warps bases.
When you retire a base, remove it according to the maker's guidance so you do not damage the board. Gentle heat and a soft tool are usually safer than force, and any residue should be removed before you apply a new base. Keep a spare base and thumbscrew in your bag, because the parts that fail first are often the smallest.
A worked example: mounting for a shortboard and a longboard
The same camera behaves very differently on two boards. On a shortboard the deck is narrow and has more curvature near the nose, and the board moves quickly, so the camera sees more rotation and more spray. A low-profile base that is rated for curved surfaces, a short fixed arm and a short tether give the most stable result. Keep the camera well forward of your lead foot so it does not interfere with take-off, and check that it does not catch the water when the nose dips.
On a longboard you have more flat deck area, so a standard base sits well and you can choose between nose and tail positions. A nose mount gives a classic view of the rider and the wave face, while a mount near the tail looks forward over your shoulders. Longboards carry more speed in a straight line and are often walked up and down the board, so keep the mount clear of your walking path and your toes. Whichever board you use, test the mount on land, then in small, safe surf, and review the clips before you commit to a bigger day.
Notice what does not change between boards: the surface prep, the curing time, the tether and the rinse. Those are the habits that keep a camera on the board. Position is a creative choice; the install is a safety choice, and it deserves the same care every time.
Questions to ask before you buy
A mount page should tell you which boards and surfaces the adhesive is rated for, how long the base needs to cure, what camera weight the mount is rated for, and whether a tether point is built in. It should also describe how to remove the base without damaging the board, and which temperature range the adhesive suits. If it cannot answer these questions, ask a different seller or choose another mount. Also check which cameras and housings the page names, since a mount that fits a bare camera may not hold a housed one securely.
A short pre-session checklist
Pull the mount by hand, check the tether, check the base edges for lifting, wipe the lens, confirm the card and battery, and make sure nothing touches your leash. Do this every time, on the sand, before you paddle out.
Yes. A surfboard mount uses an adhesive base on the deck and holds the camera on a buckle. Install it on a clean, dry, wax-free surface, wait out the maker's curing time and add a retention tether, since no mount is immune to detaching.
How do I use a GoPro while surfing?
Common options are a board mount on the nose, a hand-held floating grip in the water, or a chest or mouth mount. Test the setup on land and in shallow water first, start recording before you paddle out, and tether the camera to the board or to you.
What GoPro is good for surfing?
GoPro lists the HERO13 Black and HERO12 Black among its current action cameras, and states they are waterproof without a housing (33 ft for the HERO13 Black). Whichever you choose, check the maker's page for mount support and add a tether.